The MacBook Air presents a unique problem that is not found with other Apple products. With other Apple computers the ‘Macquisition’ tool can be used to create an image of the drive in question if the drive is not easily accessible. Unfortunately Macquisition requires a free firewire (IEEE 1394) port in order to boot the computer into acquisition mode. The MacBook Air has only one USB port, no firewire port, and no optical drive. The Apple website suggests that only an Apple branded USB optical drive will allow booting from optical media (such as Helix). These drives can be costly and largely pointless to purchase.
This guide provides a (relatively) simple method of removing the internal drive and imaging the drive using EnCase (or whatever brand of imaging tool you use).
Firstly, meet the MacBook Air:
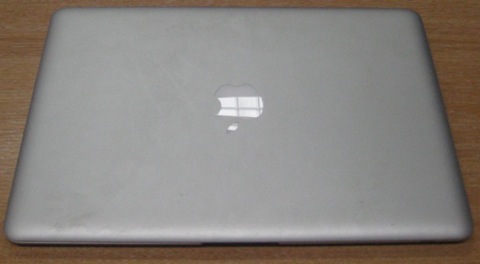
The first thing you will notice is that this is a very thin computer; it has an aluminium (aluminum for you non-Brits) case. This is quite slippery so take care not to drop it.
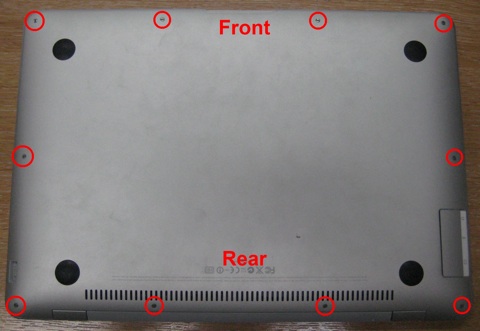
The first thing you will need to do is turn it over.
There are ten screws that need removing (circled below). The front six screw are the same size; the rear-corner screws are a little longer; the middle-rear screws are longer still. Keep track of these for putting it back together.
Once the bottom of the case is off you are going to focus your attention on the rear-right corner of the computer (highlighted below).
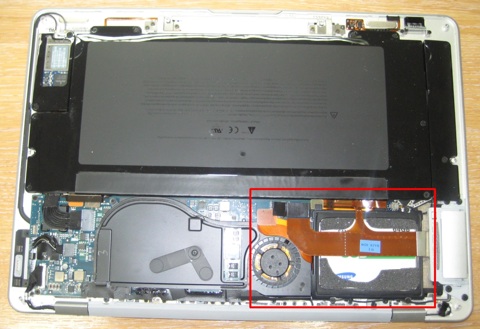
When you look closer at this corner you can see two ribbon cables. The first of these is disconnected at ‘A’ by pulling on tab ‘B’ below:
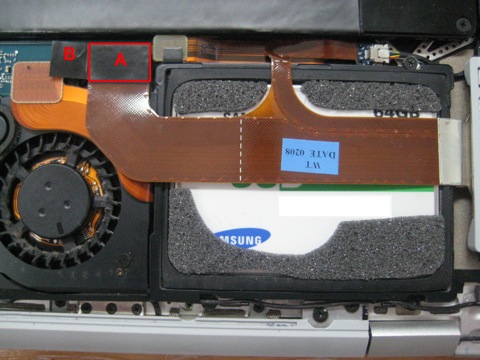
Once this has been completed you will see four more screws (circle below). The top two screws are easily enough removed, the bottom two screws are partially obscured by a thin wire. The wire is tucked in the drive cage. Gently pry the cable away until the screws are exposed and remove the screws.
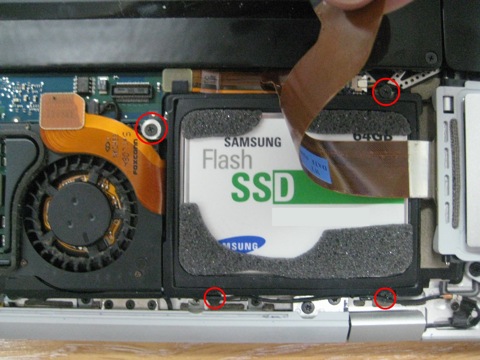
We are now ready to remove the second ribbon cable. Gently pull it away (marked in red below) until it is no longer connected.
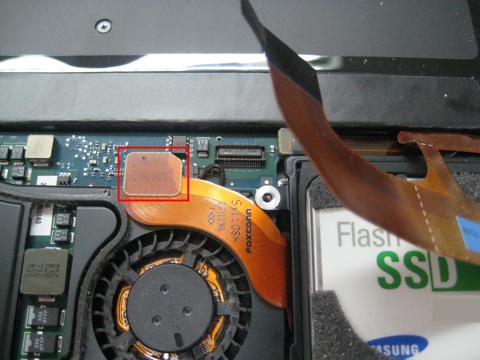
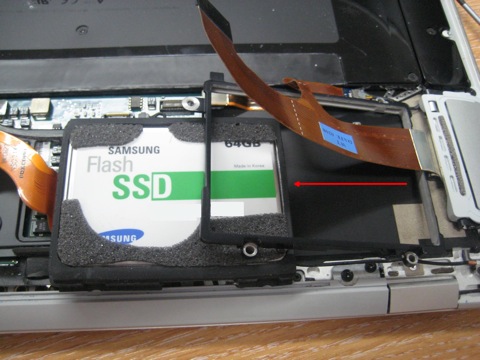
Removing the drive is not difficult, carefully life the drive cage and slide the hard drive out from underneath. Do not pull it out from the top or try to remove the drive cage as you may cause irreparable damage.
Once you have removed the drive the drive turn it over and carefully remove the black tape covering the ribbon connection (marked below).

Once the tape has been removed the ribbon connection is exposed. Carefully pull the ribbon cable out of the connector (marked below).
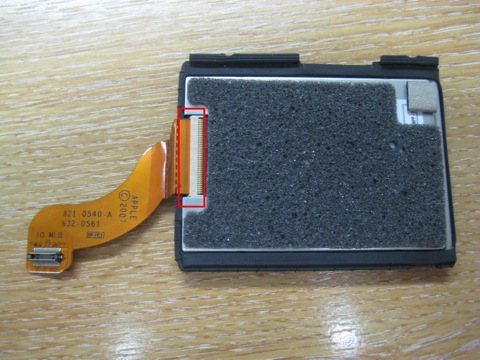
When finished you should have something the looks like the picture below:
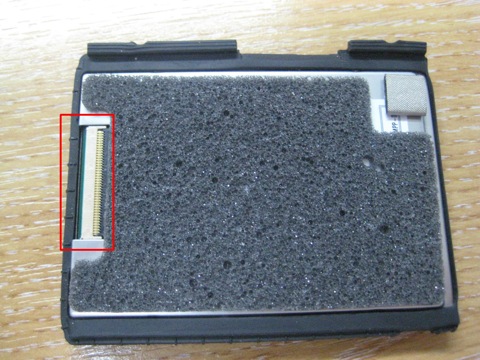
This is a ‘ZIF’ drive. These drives are commonly found in iPods and ultraportable PCs. In order to image this drive you will require the following:
- Either a ‘Tableau T14 IDE’ or a ‘Tableau T35e’ write blocking device
- A ‘TDA5-ZIF’ drive adapter kit
Why so specific? Well, Tableau state that the ‘ZIF’ adapter is only guaranteed to work with one of the two Tableaux mentioned above. I do not want to risk something going wrong so I’ll follow their advice. Thankfully I had a ‘T35e’ already available. You can try using this adapter with a different model, or even a different brand of write-blocker, but its not recommended.
Carefully insert the new ribbon (provided with the adapter) into the ribbon connector on the hard drive and then connect the other end of the ribbon into the adapter (see below). Then plug the adapter into the Tableau.
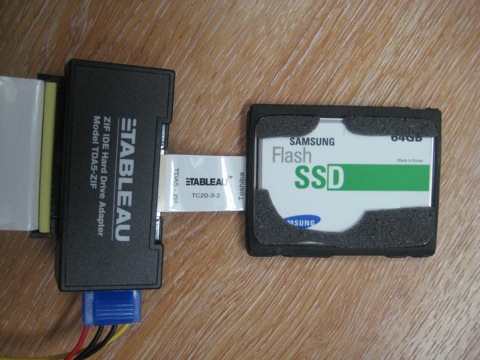
From this point forward it is exactly the same as acquiring any other hard drive. The Tableau will pick up the drive allowing you to image as normal.
Hope this is useful to someone out there.

8 responses to “MacBook Air Acquisition”
That drive is quite flash, ain’t it?
Can’t you use the usb adaptor for the Macquisition tool to acquire the MacBookAir.
Thanks a lot for this one….indeed very useful for us !!!
I purchased a Targus USB optical drive from Best Buy and was able to boot the Air. Used the EnCase Portable boot CD.
Followed the above guide step by step, had my Samsung SpinPoint 80 GB drive out and imaging in under 10 minutes.
Thanks for the info…….
Thanks for posting this. Very helpful. Are you aware of a terminal command that allows the Air to be booted into acquisition mode (as if it were an external HDD)? Is it power+T Key ?? Just curious. Need to know.
Thanks
This is a first-rate post! It is well written and clearly annotated. It eliminates all of the guesswork. It is one of the best posts I’ve seen on any computer forensic topic. If you are not a teacher, or a technical writer, you should consider it!
Thanks Alan! That is very kind of you to say. Sadly the post is a little out-dated these days as Apple changed their connector to LIF and then changed the drive altogether.